RedBrick AI customers use the platform for both ground-truthing and clinical validation studies. Depending on the scale and complexity of the algorithm, clinical validation studies can have complex workflow requirements, including measuring inter-annotator agreement and comparing the performance of annotators blinded & unblinded to Computer Aided Diagnosis (CAD) annotations.
In this document, we’ll walk through how RedBrick AI can be used for a hypothetical clinical validation study of a chest anomaly detection algorithm. Our chest anomaly detection algorithm will classify an image as normal or abnormal. If abnormal, it will draw a bounding box around one of the following anomalies — Aortic enlargement, Atelectasis, Calcification, Cardiomegaly, Consolidation, ILD, Infiltration, Lung Opacity, Nodule/Mass, Other lesion, Pleural effusion, Pleural thickening, Pneumothorax, Pulmonary fibrosis.
Study design
In this study, we will compare the performance of Computer Aided Diagnosis against expert annotators. See the image below for the study workflow:
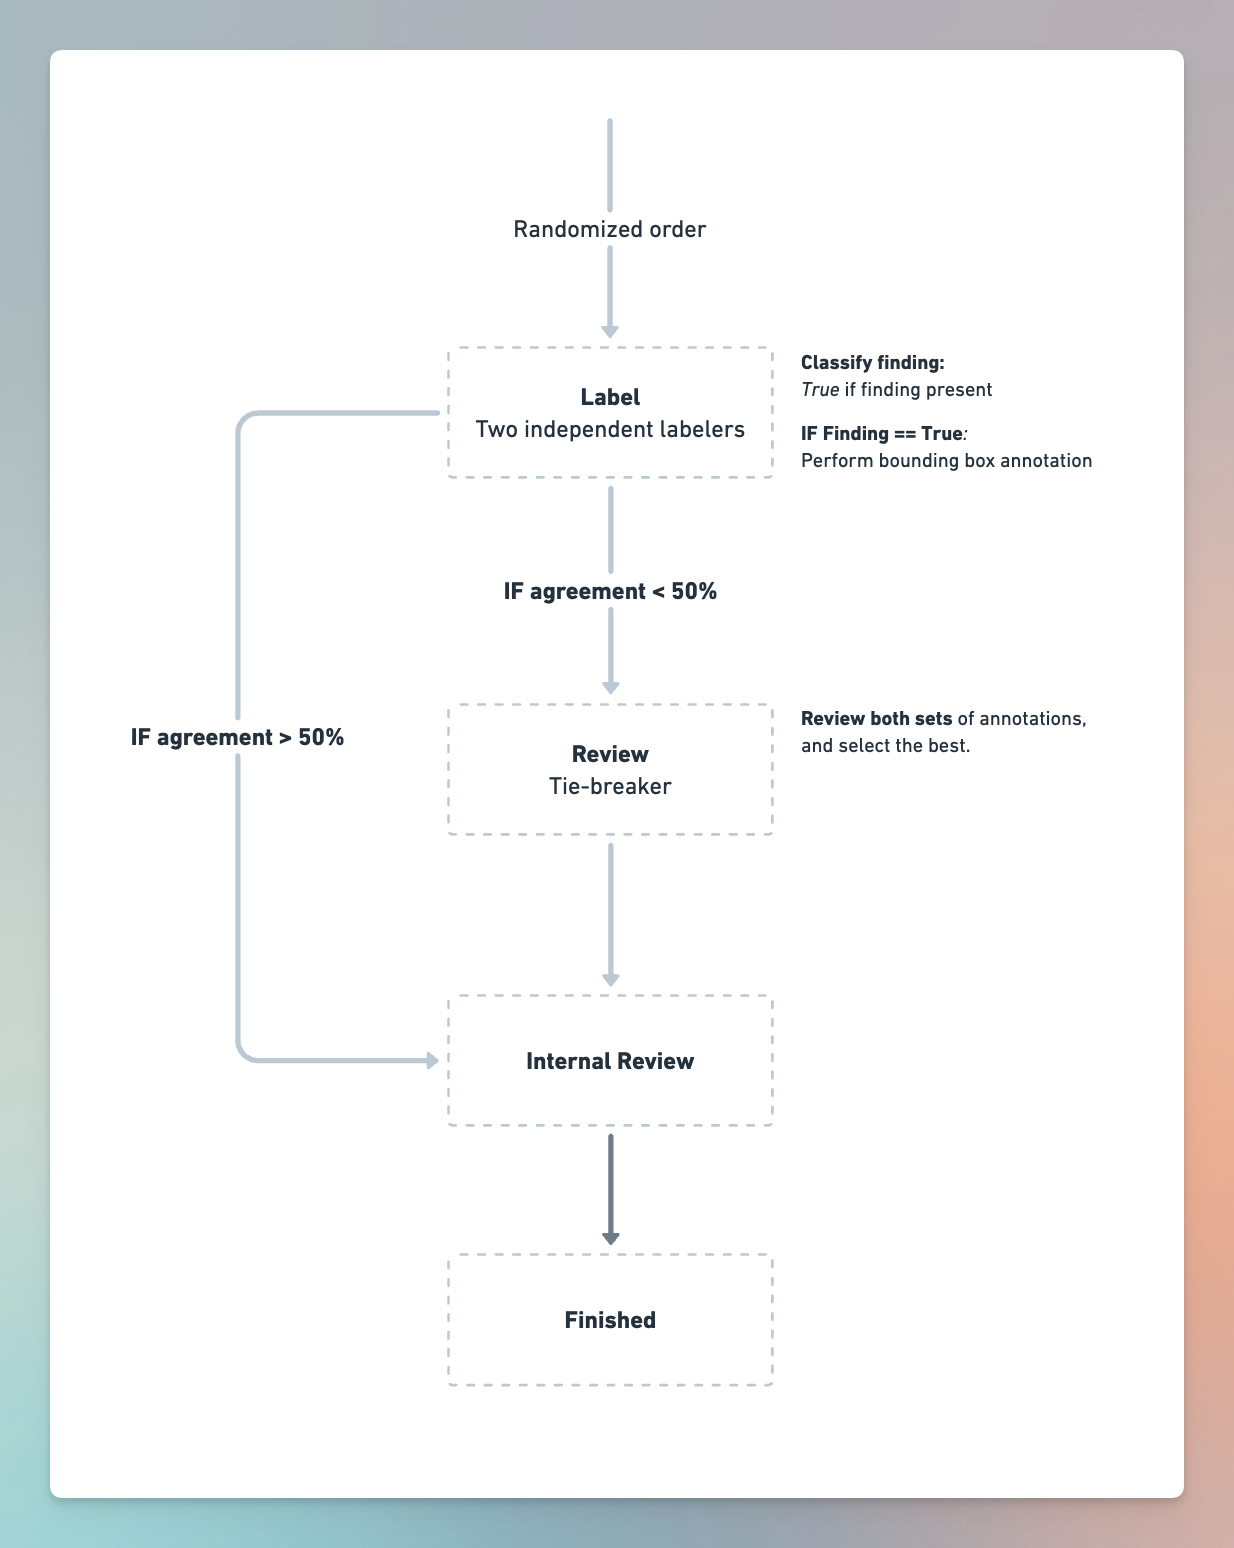
The components of the workflow are:
- Label: We’ll have two labelers independently annotate each scan. They will be required to classify scans that have Findings present. If a finding is present, they must draw a bounding box around the finding.
- Review: We’ll have a single reviewer review all scans with less than 50% IOU agreement between the two labelers. The reviewer's objective is to (a) select the best set of annotations and (b) do annotations from scratch if both labelers were wrong.
- Internal Review: This stage is meant to simulate an internal review process amongst the engineering team. Within this review stage, reviewers will be able to see the final set of annotations generated and compare them to uploaded Computer Aided Diagnosis annotations to see how the model compares to human annotators.
Project setup on RedBrick AI
Creating a taxonomy
We need to define a taxonomy that allows our annotators to annotate correctly. There are two tasks:
- Study Classification: Mark true if Finding is found.
- Object Detection: Draw a bounding box around the finding belonging to one of these categories — Aortic enlargement, Atelectasis, Calcification, Cardiomegaly, Consolidation, ILD, Infiltration, Lung Opacity, Nodule/Mass, Other lesion, Pleural effusion, Pleural thickening, Pneumothorax, Pulmonary fibrosis.
Creating a taxonomy can be done through the UI or through the Python SDK:
The end result will be the following taxonomy:
Creating a project
We need to create a project with the workflow references above. As with the taxonomy, this can be done through the Python SDK or UI. Here are the specific things to keep in mind:
- Review stages: Add two review stages, the first will be the tie-breaker, the second will be the internal review.
- Taxonomy: Select the previously created X-ray anomaly taxonomy.
- Consensus: Enable consensus, require 2 labelers per task, and enable auto-acceptance above 50% agreement.
- Uploaded annotations: Disable display of uploaded annotations. This will ensure the Labeler and the first reviewer cannot see the uploaded CAD results. We will assign the internal reviewer as an admin, who will be able to see the uploaded CAD results.

You can re-create this workflow through the Python SDK too:
Uploading data
The JSON file has a list of items similar to the object below. Each object represents a single annotation task, in this case, a single x-ray with its CAD results.
After downloading the data using the link above, you can import it like this:
This will import all the x-ray images and the CAD results — the classifications and bounding boxes.
Adding validation checks to prevent annotation errors
A common pitfall of annotation projects is instructions are under-defined, often leading to violations of the annotation schema. For example, annotators may forget to perform a classification task or add extra bounding boxes when only one is expected.
We will add validation checks to ensure annotations obey a logical schema. These validations are done by user-defined Javascript code running in the browser in real time while labelers annotate.
For our project, we will check the following:
- If the Finding is marked True, there must be a bounding box annotation.
- There can only be 1 bounding box annotation.
Add the following script to the Label Validation entry in Project Settings.
Going through the workflow
Adding users to the project & assigning cases
Let's invite our labelers and reviewers with the project setup and data upload complete. We will have two users perform annotation in Label, one reviewer in Review, and admins perform Internal Review.
First, invite all users to your organization from the Team tab. Note that you’ll want to invite users for the Label and Review stages as members and Internal Review users as admins.
Next, invite the users to your project and assign them to the relevant stages. Once they’ve been added to a project, you can start assigning cases to them from the Data tab.
Once cases have been assigned, your users will see them appear on their dashboard. They can begin labeling by simply clicking on Start Labeling.
Reviewing tasks and measuring consensus
Tasks, where the two labelers had > 50% consensus, will automatically be routed to Internal Review. Other cases will be routed to Tie breaker review, where we can see all opinions and select the best set of annotations or create annotations from scratch.
.png)
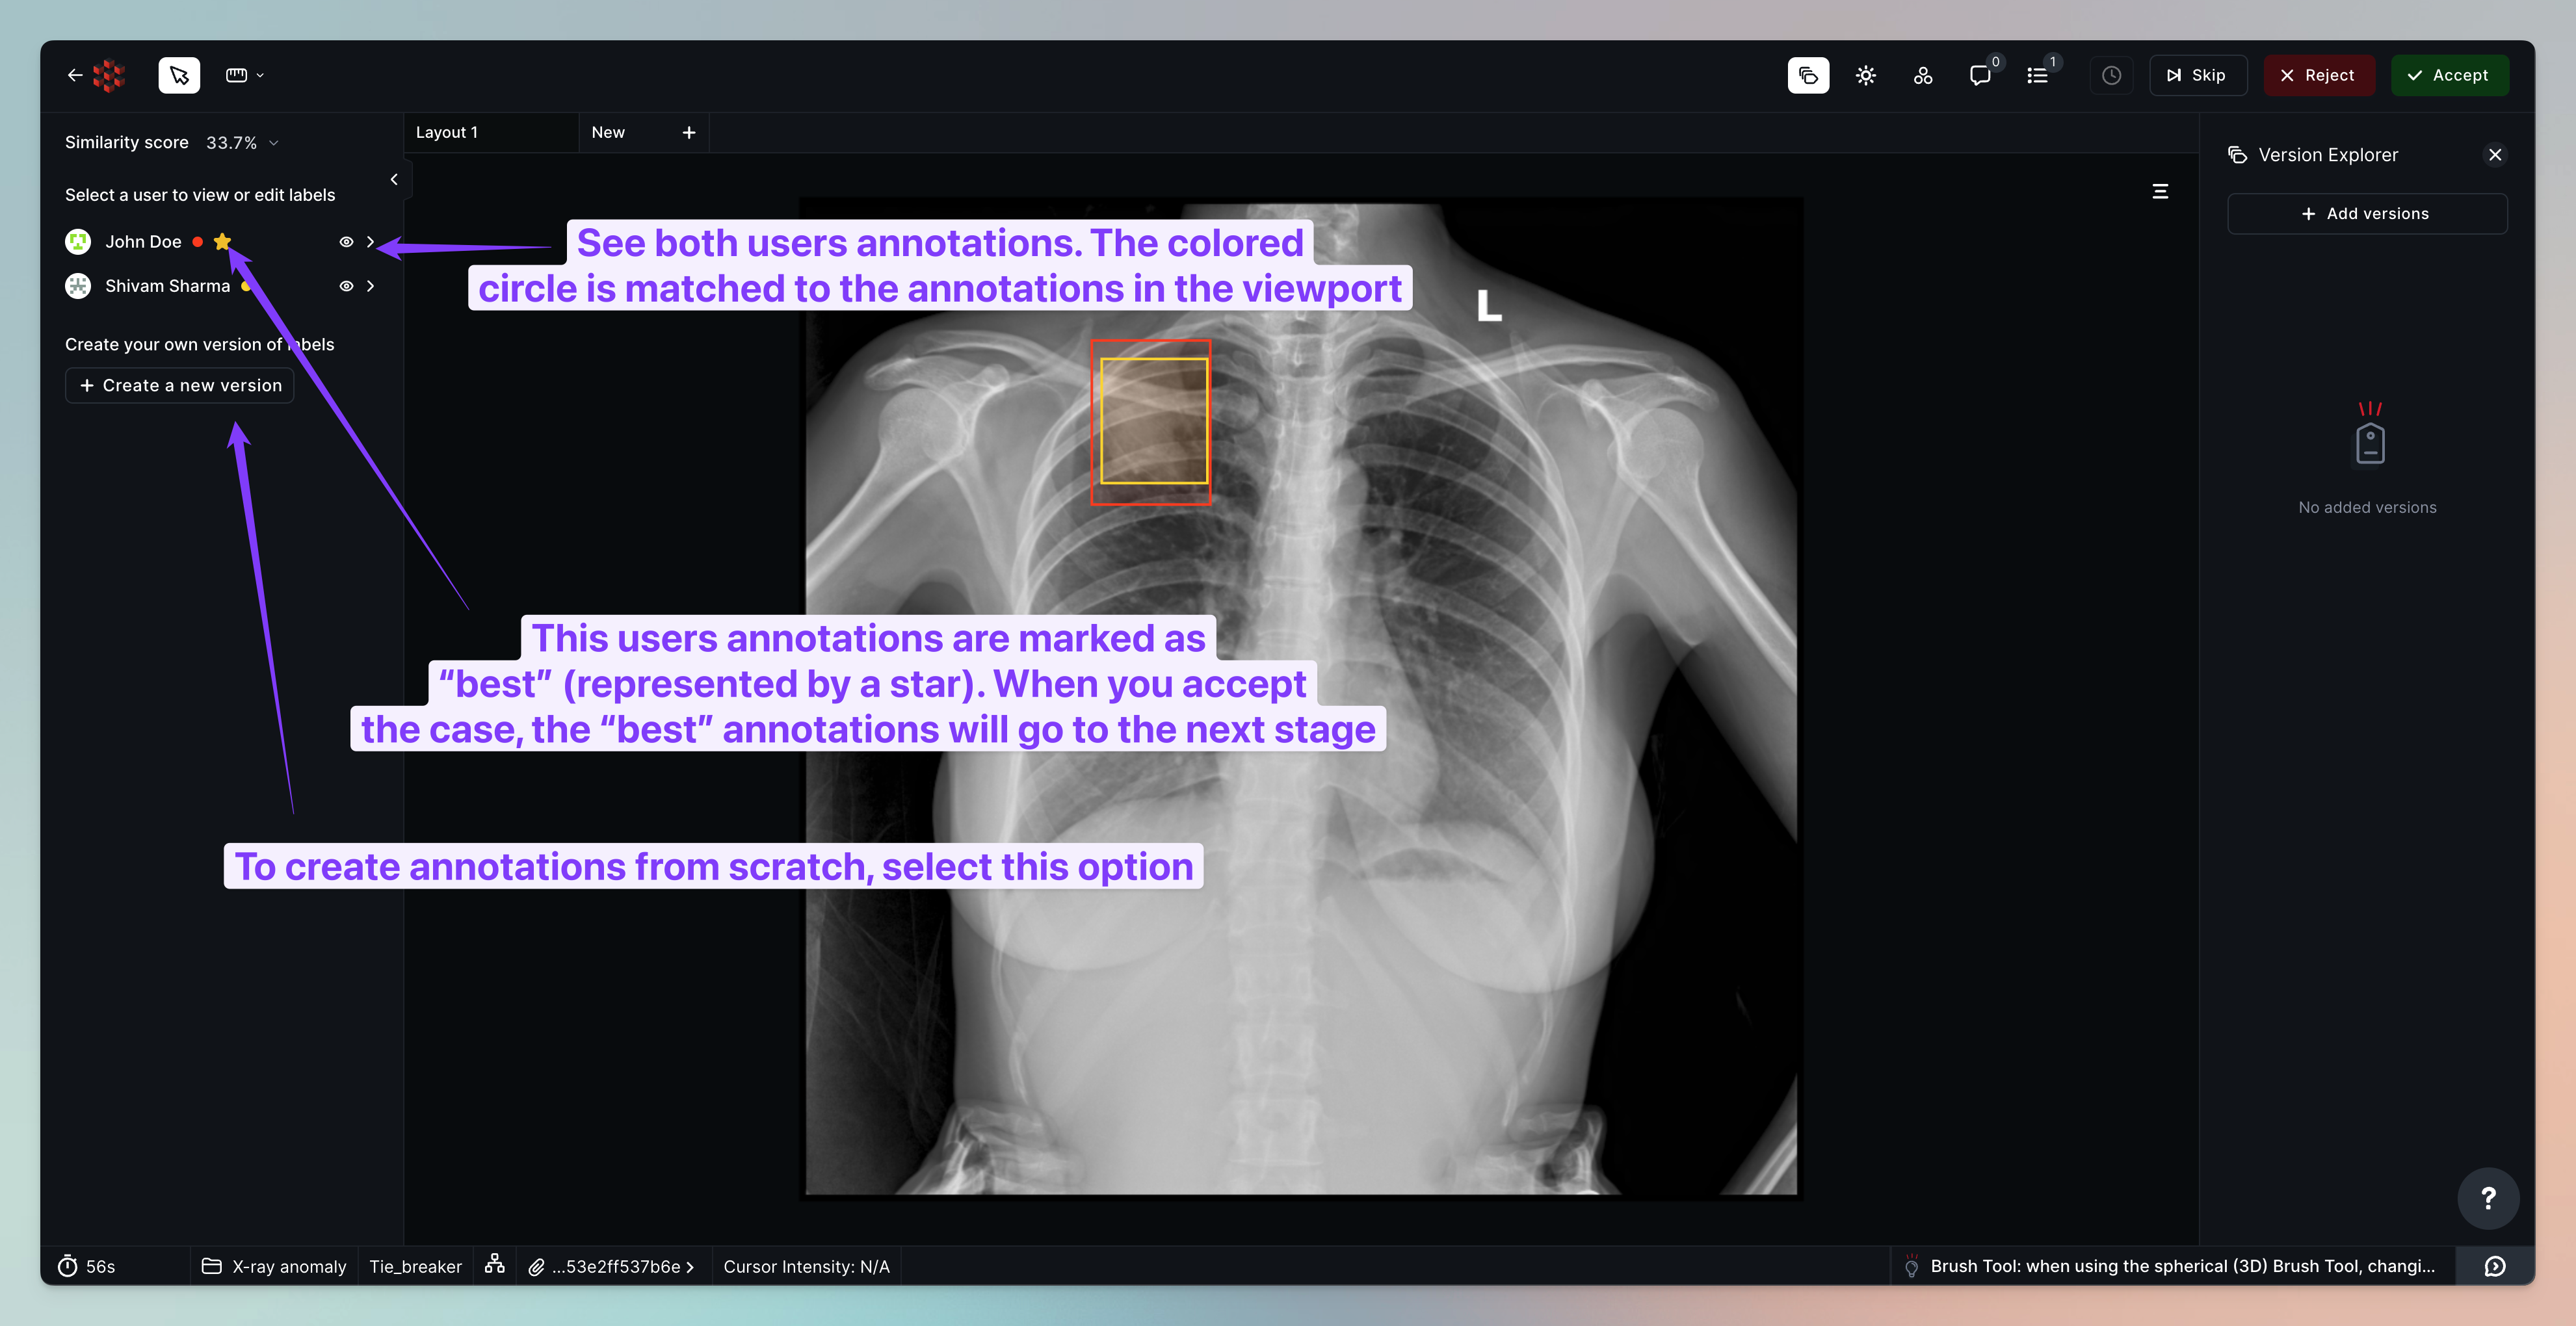
Once you assign the tasks queued in Tie Breaker review, your reviewer will be able to compare both sets of annotations and select the best.
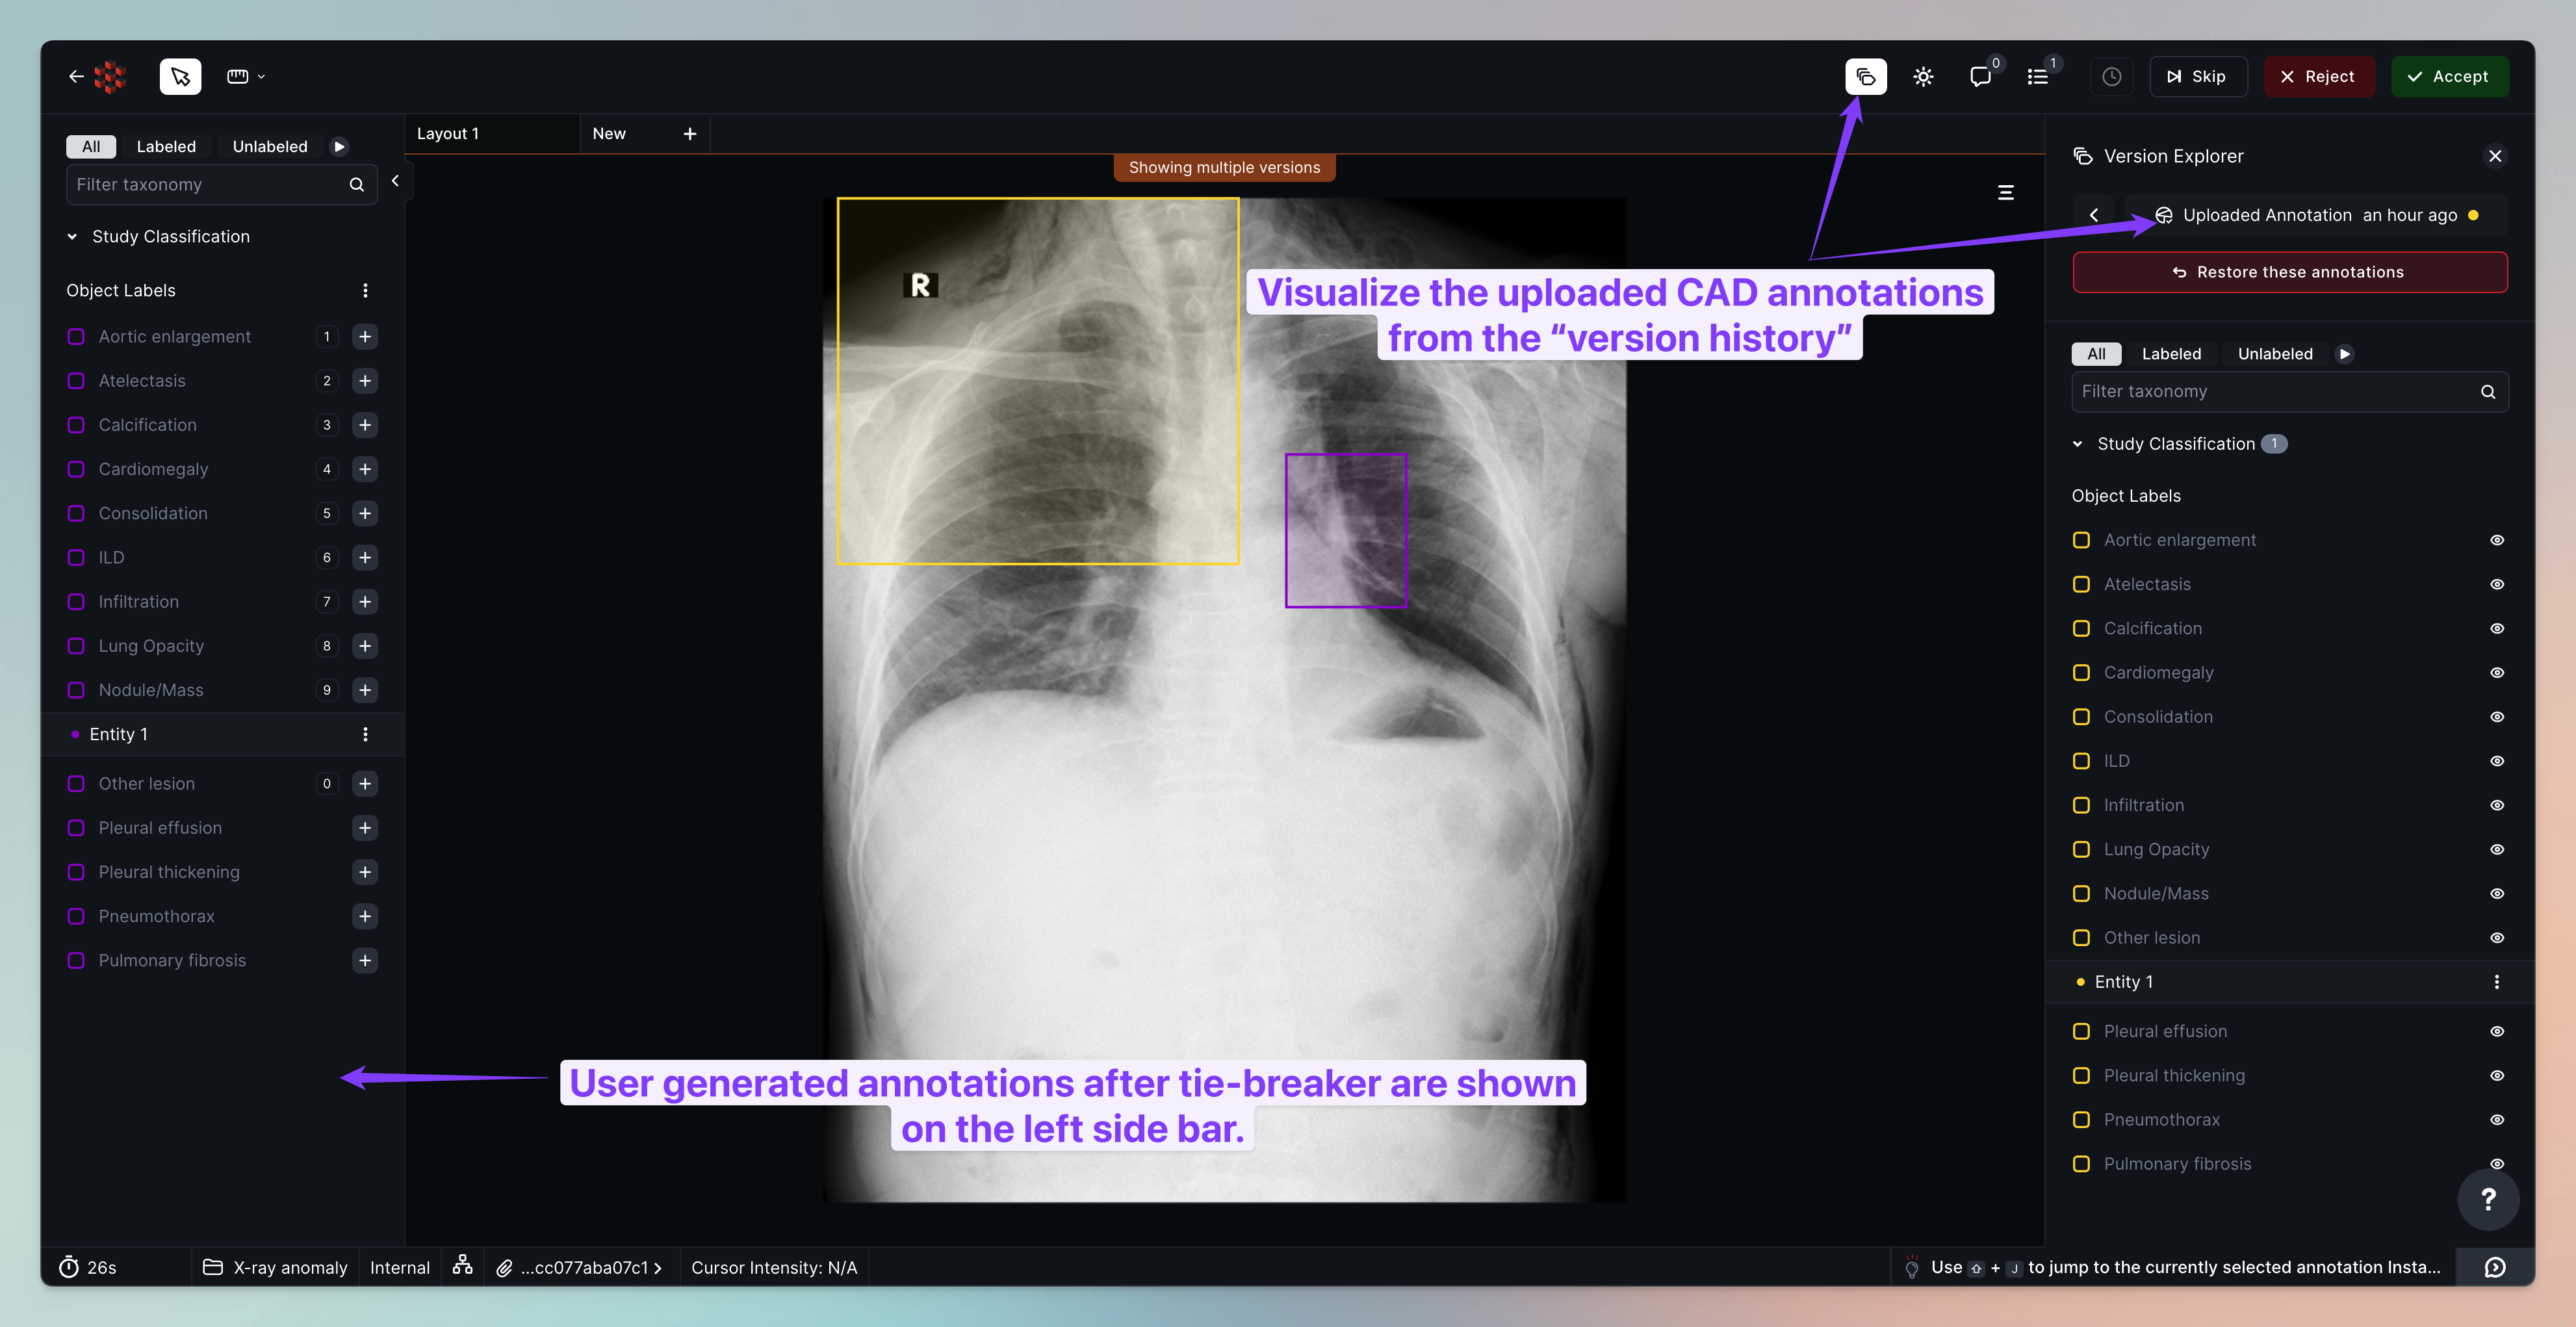
Comparing against CAD results in internal review
Once the tiebreaker has been completed, the tasks will move on to internal review. Internal reviewers can compare the user-generated annotations against the uploaded CAD annotations.
Exporting final cases
Once both review stages are complete, tasks will move to Ground Truth. These cases can be exported using the CLI or Python SDK. Please follow along with the documentation here to understand how to export tasks.
